Auto Chess Item Guide (Basic and Intermediate): What pieces to equip your items on and which items are worth combining.
In this post I’ll explain the basic item categories, and how to best choose what unit gets what item. After that, I’ll go into exceptions to the rule, and some strategies on holding certain items to aim for specific combined items, as well as how to get the most out of the items you’re not using.
Without additional metadata (item drop rates, item interactions (such as whether A Dragonbone Shield applies before or after armor reduces damage), what constitutes an attack for items like cappa, and in-depth mechanics for armor and magic resistance math, as well as proof of how items stack), I won’t be able to post a truly advanced guide. So I’m sorry if you were hoping for a bunch of math and numbers.
1. The Basics (Item Types)
Items basically come in 4 flavors: Auto Attack Items, Defensive Items, Mana Generation Items, and Frantic Mask.
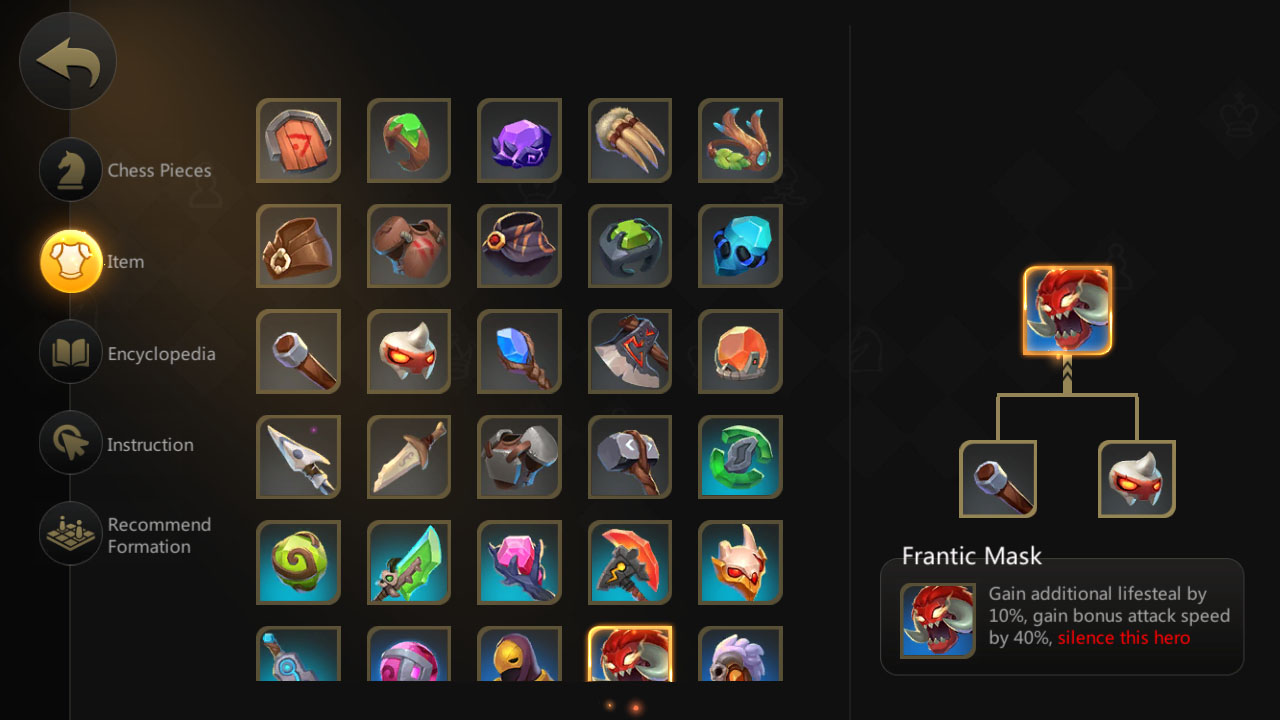
Frantic Mask
Made by the wooden club and the blood thirsty mask being combined. It gives better stats than the two items do separately, but silences the wearer, so either don’t combine those items to make that mask, or give it to a character with a “passive” ability (most notably, Egersis Ranger, Lightblade Knight, or Berserker).
Auto Attack Items
A character with long range, and high attack speed. Ideally the character will be one that survives a long time, and has an ability that doesn’t waste much time (for example, Wind Ranger’s ability takes forever, and he doesn’t auto attack while he uses it).
The best auto attackers are Berserker, Dragon Knight, Lightblade Knight, Fallen Witcher, Shining Assassin, and Dwarvern Sniper. Honorable mentions are Egersis Ranger (1star and 2star have been debuffed recently, and her attack range is somewhat low compared to the others I listed).
Helicopter (great unit for these items, but you get him very late game, if at all), Abyssal Crawler (has great attack speed, but if you’re going assassins, Shining Assassin will get more out of the items than AC will), and Frost Knight (Frost Knight does well with them, but if you’ve got Frost Knight, chances are you’ll be getting Berserker or Dragon Knight later on).
Defensive Items
Put these on your front line units, the more HP they’ve got, the more use (mathematically) they’re going to get out of each point of armor and each point of magic resistance. If a Unit has high natural armor or magic resistance (or are benefiting from the Marine, Goblin, or Warrior bonus), they’ll get more out of the hp and hp/second items.
Mana Generation Items
Mana is generated when a unit deals damage, and when damage is dealt to it. There are two things to consider when distributing your mana items: “How useful is this unit without their ability?” and “How quickly will they generate mana without this item?”
A character like Siren needs to use her ability to be of any help (unlike Dwarven Sniper, for example), but Siren won’t get her mana very quickly in the backlines, and she’ll die too quickly in the front. Example Characters that benefit from mana items: Desperate Doctor, Tortola Elder, Siren, Lightning Spirit, and Storm Shaman.
A Few More Points
Now that we’ve got the basics out of the way, let’s get a few more things clear:
- Items you put on a unit don’t take effect until their next combat (so throwing something on mid combat won’t do anything until the next round starts). Items with active abilities automatically activate as soon as they can, and as often as they can.
- According to Excoundrel and Claytano, The Crystal of Devil Blood (purple rock that decreases a target’s armor) can only affect any given target once, regardless of multiple of this rock being on the same character, or being spread out to multiple characters. Therefore, if you’re getting lots of these purple rocks, the only way to get the most out of them is to spread them out, even if that means you’re putting them on people with slower auto attack speeds or weaker auto attacks.
- According to Excoundrel and Claytano, items that grant lifesteal (The Frantic Mask and the Blood Thirsty Mask specifically) don’t stack, so same story there. Spread it around. Same goes for the Shield and the Dragonbone Shield.
Now then, onto intermediate strategies.
2. Intermediate Guide (Specific Items)
Most combined items are pretty straightforward, and just throwing items onto the proper units will get you pretty far, even moreso if you have the patience to wait for a better unit to put it on (putting the AA items on Dwarven Sniper instead of dumping all of your early ones onto an egersis ranger, for example).
You might even get lucky and combine them into something better, freeing up a slot for more items. But there are a few combined items that require us to think ahead: Barbaric Cuirass, Blade Mail, and Orb of Refresh. These items are special because if you follow my advice from above, you’ll rarely (if ever) make one.
Barbaric Cuirass
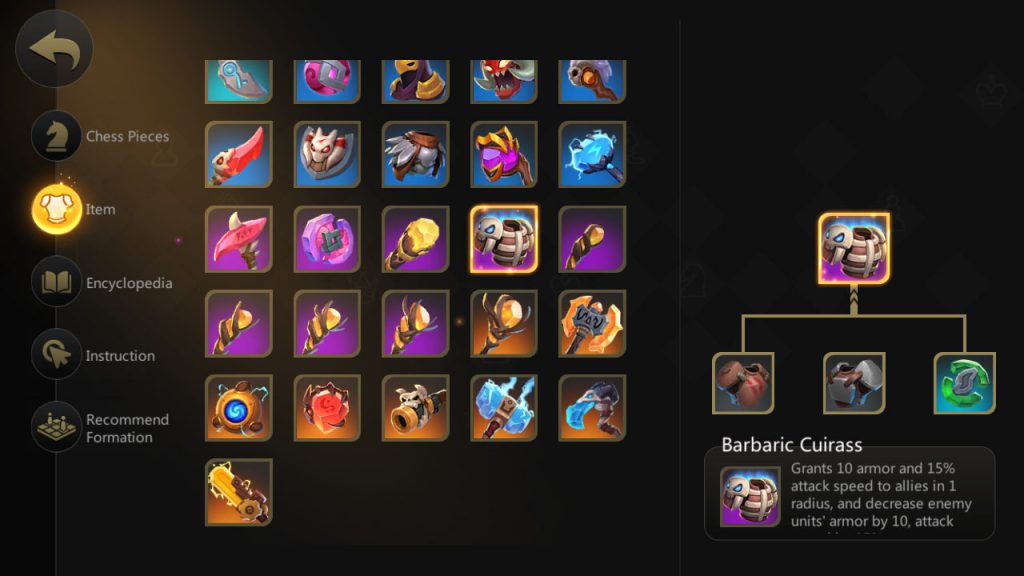
The Cuirass mixes an attack speed item with two armor items. The Cuirass is best put onto your main tank. The odd item out here is the Wraith Shard.
Blade Mail
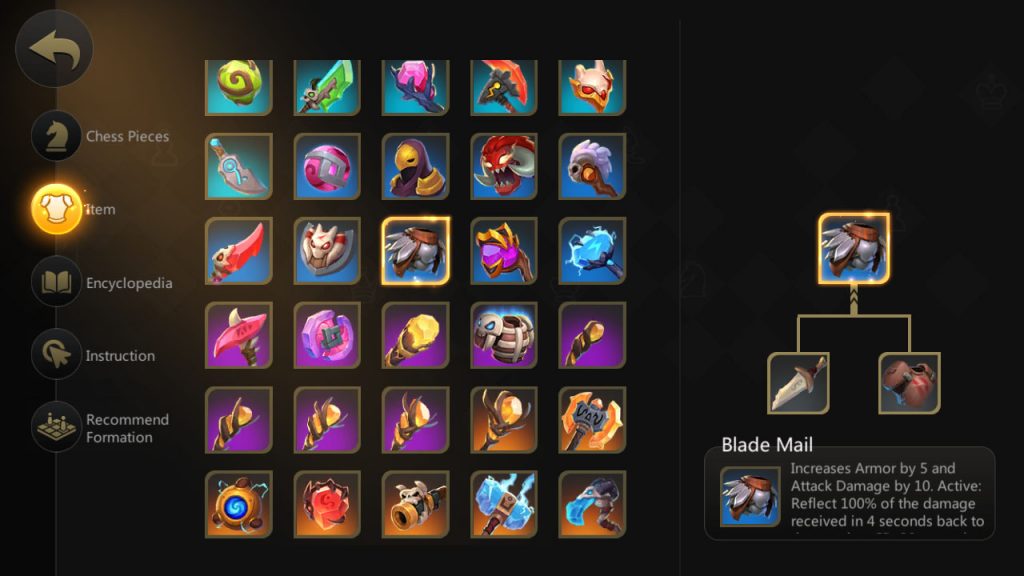
The Blade Mail mixes a damage item with an armor item. It is best put on your main tank. The attack damage it gives is less than the Broken Sword it’s made from.
Orb of Refresh
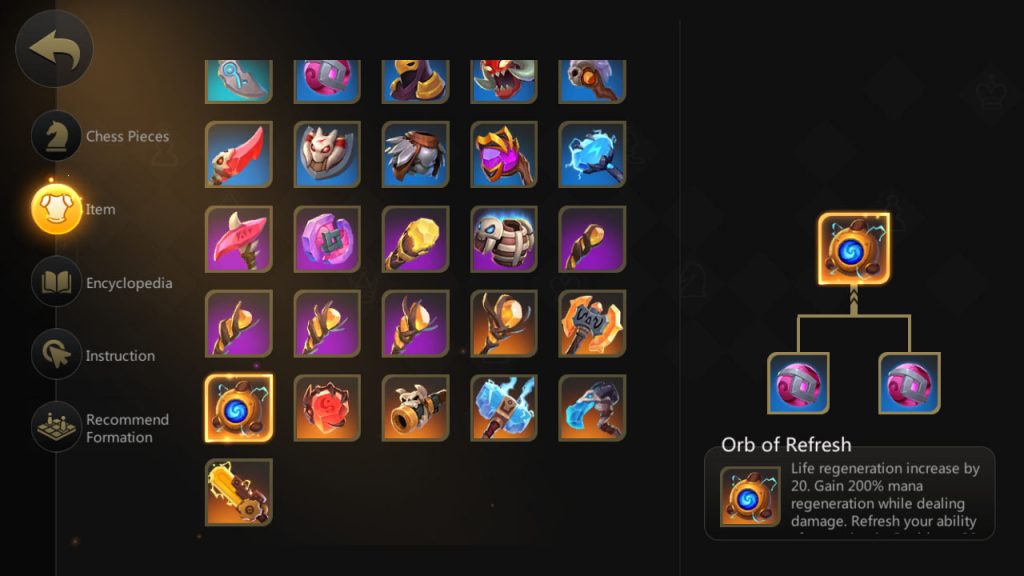
The Orb of Refresh is the strongest item in the game (or at least it’s the flashiest). It is made from two Orb of Regens, each of which is made from a Ring of Life (10 hp/second regen) and a Magicka Crystal (+100% mana generation).
The Orb of Refresh gives +20 hp/second +200% mana generation, and instantly refreshes the ability’s cooldown after it’s used. Having one on a Pirate Captain or Siren or Dark Spirit or Helicopter or Razorclaw or Devastator or anybody with a great ultimate will absolutely win you fights.
“Trap” Items
Not all items are created equal. Here are three “trap” items that you probably shouldn’t combine into… maybe ever.
The Anti-Maga Cloak
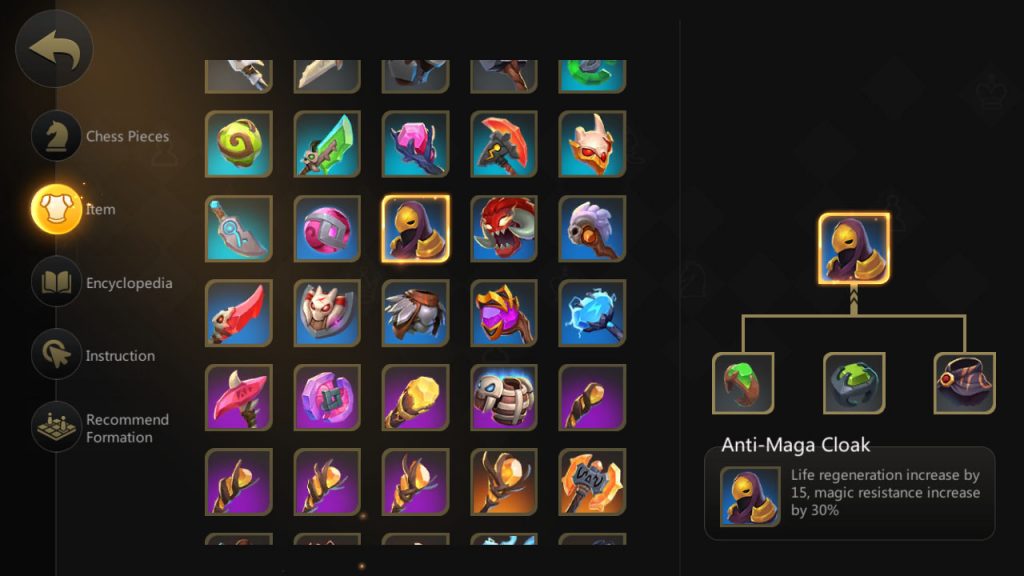
It’s the only item that is built from the Ring of Regen, and it uses all defensive items. It’s often available early, sometimes even before you’re done fighting the treants, so what’s the problem? It uses a Ring of Life. Meaning we’ve put ourselves further away from making an Orb of Refresh. The only benefit the cloak gives is 30% magic resist instead of 15%.
The Dragonbone Shield
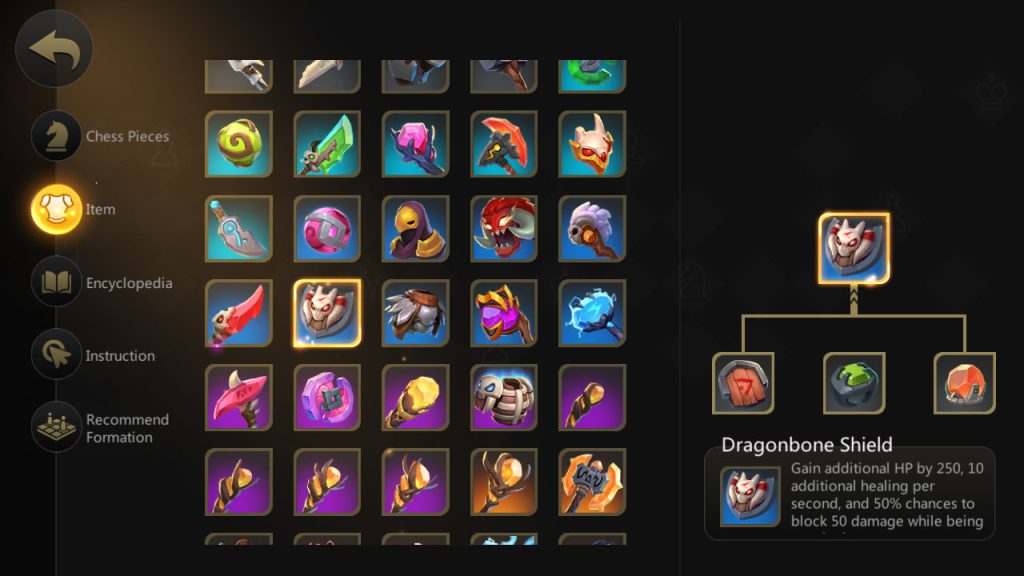
It’s the only item that is built from the Shield, and it uses all defensive items. It’s often available early, sometimes even before you’re done fighting the treants, sounds familiar? The Dragonbone Shield also uses a Ring of Life. Even worse, it uses up a Life Crystal, which ideally we want to turn into a Heart of Tarrasque.
The Scythe of Vyse
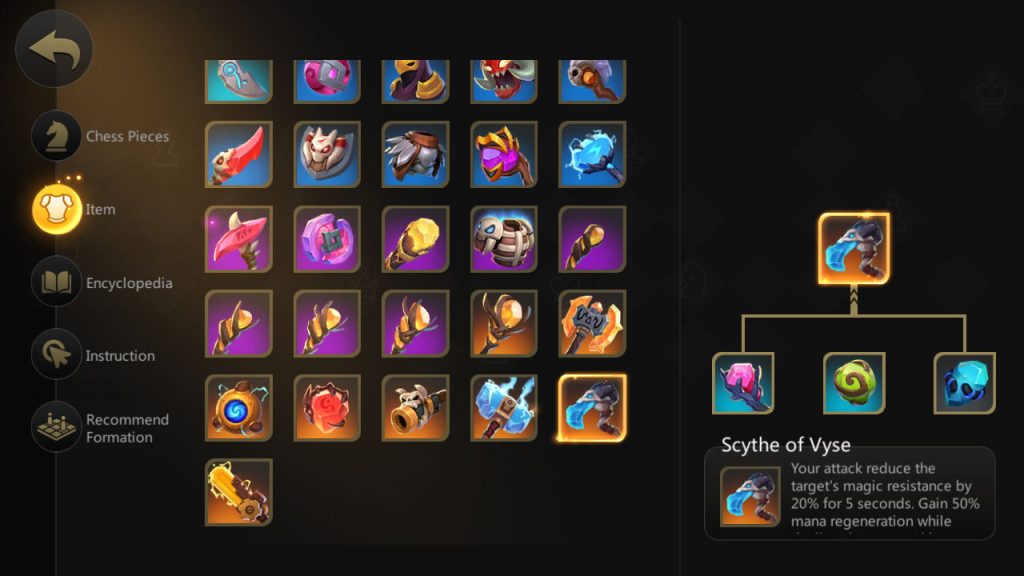
This item is built from three mana generation items – a Nether Essence (which will usually go onto a tank), a Mysterial Staff and a Magicka Crystal. The Magicka Crystal we want for our Orb of Refresh, but if you’ve got a Nether Essence drop, it might be too late to get that Orb of Refresh anyway. The big issue with the Scythe of Vyse is that it is significantly worse than the sum of its parts. And all it has to show for it is essentially the Shaman synergy built into an item.
Bonus Tips
Alright, nearly there. Last bit of advice is something that most of you already instinctively realize.
Items that aren’t on a unit, or that are on a unit on your bench, are wasting possible stats, and therefore are inefficient; whenever possible, we should find a way to field those items.
This seems like it contradicts my earlier advice of waiting for the right unit (like putting your AA items on your Egersis Ranger instead of waiting for your Dwarven Sniper).
The trick is to put the items on units that you’ve got on the board that you know will be sold, without a doubt. I recall watching Viiince stream (number one NA player) and he threw all of his items on his two star unicorn for one round, sold it and bought a Fallen Witcher, equipped everything onto it the next round, then sold that unit and put it all on the shadow devil he just bought.
None of those units were part of his long-term comp, but he made sure he got the most out of the items, without committing them to sub-optimal units.
Thanks for taking the time to read this. If you’ve got any concrete data about the item interactions or item math like I had mentioned up top, I’d be happy to hear it. Depending on how the math works, it might be enough to redeem the Dragonbone Shield, and we may discover other things along the way too.