A comprehensive Auto Chess guide on essential fundamentals to help improve your game. Recommended builds, transitioning, economy, win streak, lose streak, middling, open fort, positioning, items and more.
1. Know Your Ideal Team Composition
It is important to be familiar with the meta team compositions and know exactly which units you are looking for. This saves you time and gold (you don’t have to think about whether you should buy or hold onto a certain unit).
It is also important to not tunnel vision into only looking for the ideal units; instead, understand what purpose each unit in a certain composition serves (synergies) as this will help you understand which units can serve as substitutes for your ideal units when you cannot find them or when they are too contested to be considered viable.
Team compositions that I recommend striving towards:
Warriors + Beasts (8)


 Abyssal Guard
 Berserker
 Doom Arbiter
 Pirate Captain


 Poisonous Worm
 Razorclaw
 Tusk Champion
 Werewolf6( 6 / 9 )0( 1 / 6 )0( 1 / 4 )0( 1 / 4 )0( 1 / 6 )1( 1 / 1 )2( 2 / 6 )4( 4 / 6 )1
- Units to 3*: Razorclaw, Tusk Champion, Abyssal Guard
- Supplemental units: Siren/Tsunami Stalker, Soul Reaper/Dark Spirit
- Defensive items on Doom Arbiter, Offensive items on Berserker, Magicka Crystal on Poisonous Worm
- Start with any 6 warriors unless you have 2* Poisonous Worm / Razorclaw
Warriors + Hunters (7)
Abyssal GuardDoom Arbiter

 Dwarf Sniper
 Egersis RangerPirate Captain
 Siren
Siren Soul Reaper3( 3 / 9 )3( 3 / 6 )0( 1 / 6 )2( 2 / 4 )1( 1 / 1 )1( 1 / 1 )2( 2 / 4 )0( 1 / 6 )
- Consider transitioning to 6 Hunters when Tsunami Stalker is found (level 9, -Abyssal Guard)
- Consider transitioning to 4 Egersis when Ghost Prophet is found (level 9)
- Units to 3*: Dwarf Sniper, Egersis Ranger
- Supplemental units: Devastator, Razorclaw, additional hunters (in preparation for 6 Hunters)
- Defensive items on Doom Arbiter, Offensive items on Dwarf Sniper, Magicka Crystal on Siren
- Shining Archer / Wind Ranger can hold Magicka Crystal before Siren
Warriors + Glaciers (7)
Berserker
 Defector
 Desperate DoctorDoom Arbiter
 Fortune TellerPirate CaptainSoul Reaper3( 3 / 9 )0( 1 / 2 )2( 2 / 6 )1( 1 / 1 )4( 4 / 6 )1( 1 / 1 )0( 1 / 6 )0( 1 / 4 )
- Units to 3*: Desperate Doctor, Defector
- Supplemental units: Storm Shaman, Ghost Prophet
- Defensive items on Doom Arbiter, Offensive items on Berserker
Knights + Glaciers (8)
DefectorDesperate Doctor
 Evil KnightFortune Teller
 Frost Knight
 Hell Knight
 Lightblade KnightSoul Reaper0( 1 / 2 )2( 2 / 6 )4( 4 / 6 )1( 1 / 1 )4( 4 / 6 )2( 2 / 4 )1( 1 / 1 )0( 1 / 9 )
- Units to 3*: Hell Knight, Lightblade Knight, Frost Knight, Desperate Doctor, Defector
- Supplemental Units: Storm Shaman
- Defensive items on Hell Knight, Offensive items on Lightblade Knight
Knights + Dragons (8)
 Argali Knight
 Dragon KnightEvil KnightFrost KnightHell KnightLightblade Knight
 Venom
Venom
 Winter Chiropteran6( 6 / 6 )0( 1 / 6 )0( 1 / 9 )2( 2 / 6 )3( 3 / 6 )2( 2 / 4 )0( 1 / 6 )1( 1 / 1 )0( 1 / 9 )
- Units to 3*: Hell Knight, Lightblade Knight, Frost Knight, Winter Chiropteran
- Supplemental Units: Soul Reaper
- Defensive items on Hell Knight, Offensive items on Lightblade Knight / Dragon Knight
Knights + Hunters (7)
Argali KnightDwarf SniperEgersis RangerEvil KnightHell KnightLightblade KnightSiren4( 4 / 6 )3( 3 / 6 )0( 1 / 6 )1( 1 / 1 )2( 2 / 4 )1( 1 / 1 )0( 1 / 9 )0( 1 / 4 )- Units to 3*: Hell Knight, Lightblade Knight, Egersis Ranger, Dwarf Sniper
- Supplemental Units: Tsunami Stalker/Abyssal Guard, 2 Egersis, Devastator
- Defensive items on Hell Knight, Offensive items on Lightblade Knight, Magicka Crystal on Siren
Feathered + Hunters (7)
Dwarf Sniper Shining Archer
 Shining Assassin
 Taboo Witcher
 Warpwood Sage
 Wind Ranger
 Wisper Seer3( 3 / 6 )0( 1 / 6 )1( 1 / 2 )2( 2 / 4 )1( 1 / 1 )6( 6 / 9 )
- Consider transitioning to 6 Hunters when Tsunami Stalker is found (level 9 required, -Wisper Seer)
- Units to 3*: Warpwood Sage, Wisper Seer, Taboo Witcher, Dwarf Sniper
- Supplemental Units: Razorclaw, Marine
- Offensive items on Dwarf Sniper
Feathered + Assassins (7)
 Abyssalcrawler
 ShadowcrawlerShining AssassinTaboo WitcherWarpwood SageWind RangerWisper Seer3( 3 / 6 )1( 1 / 2 )2( 2 / 4 )0( 1 / 6 )0( 1 / 4 )6( 6 / 9 )
- Units to 3*: Warpwood Sage, Wisper Seer, Taboo Witcher, Abyssalcrawler, Shadowcrawler
- Supplemental Units: Razorclaw, Marine
- Offensive items on Shadowcrawler
Feathered + Dragons (8)
Dragon KnightShadowcrawlerShining Assassin Shining DragonTaboo WitcherVenomWarpwood SageWisper Seer0( 1 / 6 )3( 3 / 6 )0( 1 / 9 )1( 1 / 2 )2( 2 / 4 )3( 3 / 6 )0( 1 / 6 )6( 6 / 9 )
- Units to 3*: Warpwood Sage, Wisper Seer, Taboo Witcher, Shadowcrawler
- Supplemental Units: Razorclaw
- Offensive items on Dragon Knight
Mages + Warriors (7)
Pirate Captain
 Storm Shaman
 Swordman
 The Source
 Thunder Spirit
 Tortola ElderWerewolf3( 3 / 9 )0( 1 / 2 )3( 3 / 9 )4( 4 / 6 )2( 2 / 4 )0( 1 / 4 )0( 1 / 6 )
- Consider transitioning to 6 Mages when God of Thunder is found (level 9, -Werewolf)
- Units to 3*: Swordman, Thunder Spirit
- 2x 2* Thunder Spirit is very strong
- Supplemental units: Dark Spirit, Helicopter
- Magicka Crystal on Tortola Elder and Storm Shaman
Mages + Dragons (8)
Dragon Knight Flamming WizardPirate CaptainShining DragonThe SourceThunder SpiritTortola ElderWinter Chiropteran0( 1 / 6 )6( 6 / 9 )0( 1 / 9 )3( 3 / 6 )4( 5 / 6 )0( 1 / 9 )0( 1 / 4 )0( 1 / 4 )
Pirate Captain can be substituted with God of War
- Supplemental units: Storm Shaman, Dark Spirit, Helicopter
- Magicka Crystal on Tortola Elder
- Do not build this composition incrementally, it is a transition composition (described later on)
Team compositions I recommend staying away from (not because they are not strong, but because they are luck dependent and do not help you improve):
Divinity:
- 2* God of War is actually a really strong early game unit, but it will bait you into picking units that allow the god synergy to stay active
- Difficult to transition out of if you can’t find the specific units you need as most of your units don’t synergize with one another
- Reliant on God of War 3*
- Reliant on finding God of Thunder
6 Goblins:
- Goblins are weak mid game if you are still using them, otherwise they take up gold and bench space that could be utilized for more income and more options
- Difficult to transition out of as goblins only synergize with each other
- The composition does not do very much damage without Devastator or many 3* units
- Vulnerable to Mages
6 Assassins:
- Easily countered by intelligent positioning (described later on)
- Reliant on 3* units
Wizards
Maybe I’m just old school as the original Auto Chess stopped becoming popular around the time wizards came out, but they don’t seem that great to me.
In every situation, you would much rather have the actual unit that is being substituted for. There are better ways to stay strong while you transition to a final composition rather than forcing synergies prematurely with weak units.
So… which composition do I go pick?
Go with what the game gives you
This gets said a lot, but how do you know exactly what the game is giving you?
Each composition has core units, that is, units that the composition really can’t function without. While still undecided, you should pick these core units, and they should be the ones that lead you to consider and commit to the compositions which they are core in. Once you commit, you really need to be committed and not think about other compositions.
Here is a table of the general thought process of choosing which races/classes should be in your composition (not mutually exclusive!):
| Composition | Core Unit | Consider | Commit (conditions include previous column) |
|---|---|---|---|
| Warriors | All Warriors | Core Unit 2* | 2x Core Unit 2* |
| Beasts | Werewolf, Tusk Champion | Tusk Champion 2*, 2x Werewolf 1*, or 2x Poisonous Worm 1* | 2 of the following: Tusk Champion 2*, Werewolf 2*, 2x Poisonous Worm 1* |
| Hunters | All Hunters | Core Unit 2* | 2x Core Unit 2* |
| Mages | Thunder Spirit | 2x Thunder Spirit 1* | Thunder Spirit 2* |
| Glaciers | Fortune Teller, Desperate Doctor | Core Unit 2* | 4 Glaciers |
| Knights | Hell Knight, Lightblade Knight | Core Unit 2* | Core Unit 2* and another Knight 2* |
| Dragons | Dragon Knight | 2x Dragon Knight 1* | Dragon Knight 2* |
| Feathered | Warpwood Sage | Warpwood Sage 2* (2x Warpwood Sage 1*) | Razorclaw 1* |
| Assassins | Shadowcrawler, Shining Assassin | 2x Shadowcrawler 1* or Shining Assassin 1* | Shadowcrawler 2* |
Are certain compositions better than others?
The short answer is yes, but the difference is not that significant. Moreover, the earlier you commit, the better. You will have a lot more gold if you are able to sell off and ignore units which are incompatible with your chosen composition as opposed to holding on to multiple core units of different compositions.
A slightly suboptimal composition funded with more economy will beat out an optimal composition with poor economy. Extra gold results in higher player levels and legendary units that can help overcome any compositional weaknesses.
Transition Units
Just because you know your final composition doesn’t mean you should assemble that composition unit by unit. Compositions are defined by synergies which consist of groups of units. Therefore, we should look towards certain powerful standalone units to keep us healthy while we only have a part of a synergy.
Example: We have 3 Feathered; adding another Feathered–while part of our final composition–will provide little improvement; we could instead use a Demon until we have 3 more Feathered to add in.
Transition units are meant to be used for a few rounds and sold off once we can upgrade/fit our intended compositional units. Characteristics of transition units are high damage, impactful ability, or impactful synergy requiring few units.
Transition units are also good units to use while you are still uncommitted to a composition to buy time for you collect core units.
Transition Units (core units can act as transition units when committed to another composition; core units are often core because they are powerful):
- Demons: Fallen Witcher (+Taboo Witcher, if necessary), Doom Arbiter, Hell Knight
- Druids (easy to upgrade, less gold loss on selling): Unicorn, Wisper Seer, Warpwood Sage, Razorclaw
- Egersis Synergy: Egersis Ranger, Evil Knight, Soul Reaper
- Spirit Synergy: Thunder Spirit, Water Spirit
- Early game: Hell Knight, Ripper, Poisonous Worm
- 4 cost units: Doom Arbiter, Pirate Captain, Razorclaw, Soul Reaper, Shining Assassin
- 5 cost units
- Fortune Teller (if losing, to mitigate hp loss)
- Any unit that activates an incomplete synergy
- Any 2* unit
Transition units are usually effective enough to use at 1*, but don’t be afraid to upgrade a transition unit to 2* or even 3*. If they become powerful enough, they should actually go into your final composition; you just have to adapt to include them.
It may seem wasteful to upgrade a unit with the intention of selling them later (net gold loss most of the time), but they will keep your hp higher and may even be the reason you win some rounds, so the gold ‘loss’ is worth it.
2. Economy
Now that we know which units to buy with our gold, let’s talk about how to maximize our gold income.
Income is a snowballing/investment concept. In theory, the earlier you get to 10 gold, the earlier you get +1g/round, the earlier you get to 20 gold, the earlier you get +2g/round, etc. It is obvious that you want to save up to these thresholds as soon as possible.
An important point to understand is how much gold you miss out on when you fail to reach one of these breakpoints. Once again, in theory, delaying reaching 10 gold by 1 round will in turn delay you reaching 20 gold by 1 round, etc. which turns into a loss of 5 gold (you get 0 interest when you could have gotten +1 for 1 round, you get +1 interest when you could have gotten +2) per turn that you wait to save up to 10 gold!
Of course, in reality, what units you are offered and what you sell can help you make up for delays (or delay you even further, compounding your gold loss), but the point is that each threshold delay has significant repercussions, and you are probably not trying hard enough to reach these thresholds as you should be.
Tips on selling units (early game – before round 13)
- Keep core units (if uncommitted to a composition) and all pairs of units (except The Source, if uncommitted) unless you are sure you won’t immediately use it if it reaches 2*.
- Treat your board as an extension of your bench. Unless you are on a win streak (which trumps trying to get that extra +1 from income), don’t get too attached to the strong units you are using. Look at your board too when you are trying to reach an income threshold.
- It is worth it (even if it makes your team weaker) to sell a unit you are currently using to reach an income threshold if you know it is not going to be in your final composition (e.g. goblins!), replacing it with something that’s sitting on your bench that you already paid for. Generating more gold for the future to buy units you actually want will make up for the single digit hp losses that you will suffer.
- Once you have multiple 2* units, don’t get attached to those either! 2* units sell for 3+ gold and allow you to reach thresholds you would not be able to otherwise.
- Note: If you are on a win streak, you want to be fielding the strongest possible composition every round; the win streak is your income.
- Once committed to a composition, sell all units that can’t be used in your composition.
The Unicorn ‘Trick’
This is not just some cool gimmick; this is actually an impactful part of the game that you need to be utilizing as much as possible. Your main priority should still be gathering core units (if uncommitted) and pairs, but after that, you should be buying Unicorns (and another Druid) unless it costs you income.
Try not to sell Unicorn 1*–think of it as losing 1 gold (but that is sometimes worth it to pick up a core unit/pair). If selling Unicorns can help you reach the next income threshold, obviously do it as that was going to be their future purpose anyway.
Leveling vs Rolling vs Saving
Short Answer: Level/Roll when you have a reason to win (not for +1g from victory) and a reasonable chance to do so if you add a unit/roll an upgrade.
Level: when you have a unit to add that makes the composition significantly stronger (the unit itself is strong/activates an impactful synergy).
- Late game: only level to level 9 if all of your 3-cost and below units are at least 2*.
Roll: when you are holding onto multiple (2+) pairs of units you are looking to use, or you simply need to stop losing hp, and you have no reason to level.
- Remember, you need a good reason to want to win. Unlike leveling, where your gold isn’t ‘wasted’ (less gold needed to level again), an unsuccessful roll is actually 2 gold gone forever. Rolling now and rolling later are not equivalent in terms of reward due to higher rates of stronger units later.
- If you are unsure, don’t roll until round 17.
The worst case scenario is sacrificing gold to level/roll and still lose; unfortunately, experience and judgment are required to understand the relative strengths of different compositions just by looking at them.
Tips on rolling multiple times in a turn
- 8 bench spaces is often not enough to keep all of your options open; use your board space to hold units while you buy more (APM required).
- Unless your composition is already perfect, buy all of the 4 and 5 cost units that you have any outside remote chance of using at 2*. Many of these units at 2* are strong enough to act as a strong filler unit. At the end of the buying phase, sell whatever is not going to be used.
- (Hard) Keep a rough estimate of how much gold value is on your bench/board that you are probably going to sell so you don’t end the phase with an awkward gold amount (e.g. 28).
- Consider not rolling if finding and buying the unit you want pushes you under an income threshold.
Don’t roll unless you have more than 50g.
This quote is really greedy and outdated. If you have to stick with a number to live by, go with 30g.
Why? I don’t really have good statistical proof. It’s in the middle between 0 and 50 (that is an income threshold) (and you definitely don’t want to go all-in prematurely), and you only lose out on 2g per round (one reroll).
If you start rolling earlier, you will beat people who are trying to save. You will either build up a win streak and have just as good an economy as them along with a stronger composition or they will start rolling after you do, and they will end up at the same gold as you but with less hp.
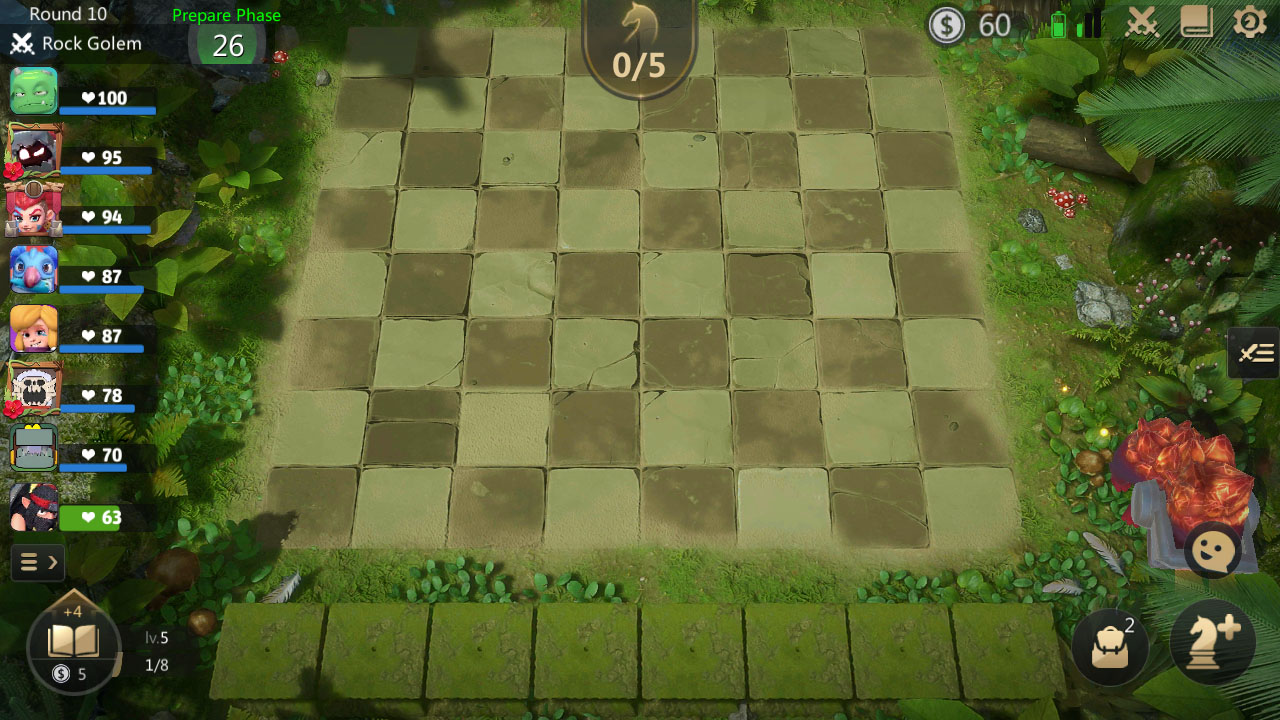
3. Walkthrough
| Round 1 | Tusk Champion / Egersis Ranger / God of War / Soul Breaker. Lock if there is a pair + a 3rd unit that complements the pair. Don’t pick an item |
| Round 2 | Sell your 1st unit if needed to get units that synergize with each other. Otherwise, good picks are Hell Knight / Lightblade Knight / Swordman / Ripper. Don’t pick an item |
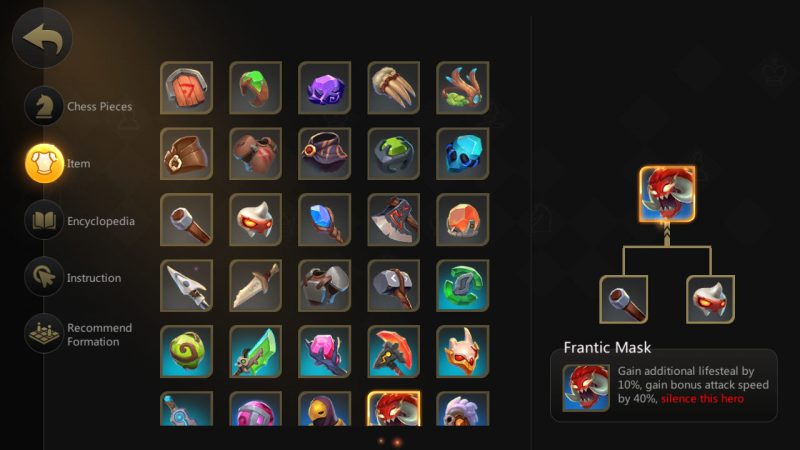
| Round 3 | End of round: Pick items (if you are fast enough, you can wait until you see your Round 4 shop before you pick): Magicka Crystal is top priority, Frantic Mask is okay if you have Lightblade Knight, Ring of Life / Cattlehide Armor / Shield otherwise |
| Round 4 | Equip items |
| Round 5 | Don't level here unless your shop is terrible and you are really confident that you can start a win streak |
Round 6
This is one of the biggest and perhaps most impactful decisions you will make each game (unless you leveled on round 5). This is because this is when most people spend 5g to level. So what should you do?
Winning rounds 4 and 5 does not mean you should level, nor does losing rounds 4 and 5 mean you should not level. Your decision ultimately hinges on the strength of your composition on round 6; however, this requires experience/scouting to make a judgment call.
Level: if you have 2x 2* units or if you feel your team is generally strong
- Proceed to Walkthrough: Winning Streak
Do not level: if you have no 2* units or if you feel your team is generally weak
- Proceed to Walkthrough: Losing Streak
- If at any time, you happen to upgrade a bunch of units you have been holding onto and you feel strong, switch to winning streak
- Losing streak walkthrough will assume your team is always weak
Not sure? It is safer not level and see what units you get next round. You can always level up late and lose out on potentially 1g from losing, but you can’t get that 5g back from leveling up (economy and reaching 10g is very important, remember?).
Walkthrough: Losing Streak
7 out of 8 games you will not have the strongest composition on round 6. 8 out of 8 games you can have the weakest composition if you want to. You can’t control how strong you are, but you can always control how weak you are.
Thus, although a full losing streak is not quite as good as a full winning streak in terms of both gold and hp, it is much more reliable to execute and is much better than having neither a winning nor losing streak.
Being the weakest: Every round you need to actively scout to make sure you will lose against anyone you are matched up against. Remove units, don’t use the maximum number of units you can, break synergies–whatever it takes.
Ideally, you place enough units on the board to kill off some but not all units to reduce incoming damage, but that can get risky. Make 100% sure you will lose; the ~10% hp you could save will not be fatal, but accidentally winning and breaking your losing streak definitely will be.
P.S. use Fortune Teller if you find one.
| Rounds 7-8 (all rounds assume you are still on a losing streak, otherwise see Walkthrough: Neither Winning Nor Losing) | Stock up on core units and pairs while saving to 10g. If your shops are really good, you might not have 10g. |
| Round 9 | Assuming you have a losing streak, you really want to maintain it to keep it through the PvE round. Scout. |
| Round 10 | >20g, 30g ideally |
| Rounds 11-12 | Lose while saving up to 50g |
Round 13
Level to level 7. Yes, that’s level 7, not 6. That’s 25 gold spent on leveling. You should still have 20+ gold left. You can roll if you have some extra gold, but don’t push your gold under 20.
Reasoning: You are probably around 50% hp right now. Obviously you have to stop losing at some point. Round 13 is when your exp requirement is a multiple of 4 so it is an efficient time to level, and you wouldn’t have survived losing until Round 17.
If you only leveled to 6, you don’t really have an advantage over most people, so there’s not really a reason you would start winning. Your advantage is in gold, and now is the time to spend it. On the leaderboard, the top player with a win streak is probably at most level 7 with 30 gold–just like you.
You are now set up to be at least the second strongest player in the game (first place has more hp and a win streak, and you’re going to break your losing streak).
That being said, you are not flipping a switch–going from instantly losing to instantly winning. Your team of 5 was probably weak, and adding 2x 1* units might not make you win.
But hey, if you lose, you’re still getting that +3g from your loss streak! The priority now is to protect the remainder of your hp, and adding 2 units will definitely help with that in the least.
We start the process of coming back into the game on Round 13, but we don’t fully expect to win right off the bat, and 40% hp is still plenty comfortable.
| Round 14 | If you happened to lose Round 13, you might as well lose Round 14 and get +3g from both Rounds 14 and 15; scout. Otherwise, lightly roll, staying above 30g. |
| Round 15 | You need to beat this. Re-position and roll even though it's a PvE round if you have to. Experience and judgment comes through once again here whether or not you are strong enough. You can't afford to lose out on preventable hp and potential items. |
| Round 16 | Roll, stay above 30g. You are still stronger than most people as you are level 7. |
| Rounds 17-19 | Doesn't matter what start you had now. Roll, maintaining 30g/20g as you see fit. |
| Round 21 | Level to level 8. If you are healthy (30+%) or stabilizing (winning) on hp, maintain 30g/20g, otherwise roll all of your gold. |
Walkthrough: Winning Streak
Sometimes you will have a good early start. Now we will see how to leverage that advantage into a strong finish.
Core focus: Trying to maintain being the strongest. How do you do that? By spending gold–leveling and rolling more often than everyone else to maximize our chances of being the strongest.
Win streak of +2: At +1, a win streak is not worth overinvesting in. At +2, you should now actively spend gold to protect it. Think about it: if you roll each round and maintain 30g and a +2 win streak, your income is the same as someone who has 50g (and probably loses to you once in a while so they don’t have a significant win streak), and your team is stronger.
Mindset: When you are winning, you don’t need to win harder by saving up to 50g and getting 8g/round. Instead, maximize your odds of maintaining a slight edge by matching the income from 50g but having a stronger foundation to build from. The former also increases the chances you will actually lose and lose your win streak.
| Rounds 7-8 (all rounds assume you are still on a win streak, otherwise see Walkthrough: Neither Winning Nor Losing) | Roll 1-2 times max if you are holding onto a bunch of usable pairs. |
| Round 9 | Level to level 6. You really want to maintain your streak through the PvE round. Maybe roll 1-2 times if necessary. |
| Rounds 10-12 | Roll 1-2 times max each round if necessary. |
| Round 13 | Level to level 7. |
| Round 14 | You really want to maintain your streak through the PvE round. Roll if necessary. |
| Rounds 15-16 | Light rolling if necessary. |
| Round 17 | Still winning or rich? Level to level 8. |
Walkthrough: Neither Winning Nor Losing
Uh oh. You tried to go for a winning/losing streak but it broke. You are definitely in a bad spot. This is the time to be greedy with your gold and save up a little more than usual because you don’t have any gold from streaks.
Aim to reach the next interest threshold immediately – consider selling any units you are currently using if they do not fit into your final composition; It does not matter if you lose; you don’t have any kind of streak.
| Round 9 | If you leveled on Round 6, level to level 6. You already half-committed, and going to level 6 more than triples your rate of finding 4-cost units. Otherwise, don't level and save up. |
| Rounds 10-16 | Don't roll unless you need better units to beat Round 15. Save up to 50g. |
| Round 17 | Level to level 7. Be willing to roll down to 20g to get your composition into a good place. |
| Rounds 18-19 | Maintain rolling down to 20g unless your composition is strong. |
| Round 21 | Level to level 8. Roll the rest of your gold if your team is still weak or you are low on hp. You just want to outlive 4 other people. |
Bonus Walkthrough: Open Fort
Definition: Open fort is the extreme of maximizing economy at the cost of hp. Interest is maximized by not spending gold on units, having an empty board and an empty bench for the first several PvP rounds.
Why do this? Because it’s really fun, not actually bad at all when done correctly and even optimal sometimes.
Open Fort vs Losing Streak
- Open fort is correct when you have nothing worth keeping on rounds 4 or 5 (only -2g overall if starting on round 5).
- Losing streak is correct when you still managed to get some 2* units or unit pairs or core units early on but aren’t strong enough.
- Open fort gains much more gold but loses more hp than losing streak.
- Open fort requires you to be very decisive and have decent APM on certain rounds.
P.S. use Fortune Teller if you find one (loss of 2-3g overall).
| Round 4 | Open fort. |
| Round 5 | Buy potentially useful units. Maintain 10g. |
| Round 6 | Maintain 20g. |
| Round 7 | If you sold everything you could hit 30g. If you managed to sell a Unicorn 2* , maintain 30g (see below). Otherwise, if you are offered really good units (e.g. Warpwood Sage + Feathered/Unicorn), you can keep them and only lose 1g overall. |
| Round 8 | (You would normally have 39g here) Maintain 30g. |
| Round 9 | (You would normally have 49g here) Maintain 40g. Buy whatever you think can help you win Round 10 |
| Rounds 10-12 | Maintain 50g. Open fort not necessarily required. Use your board as an extended bench. Try to pick up as many core units as you can. Lose. |
Round 13
Level to level 7. Roll down to 30g/20g if necessary, buying as many useful/core units as you can, putting them on your board temporarily. Be open to committing to anything, although Feathered are traditional as they are easier to assemble from scratch. From here on out, you just play as if you had a losing streak.
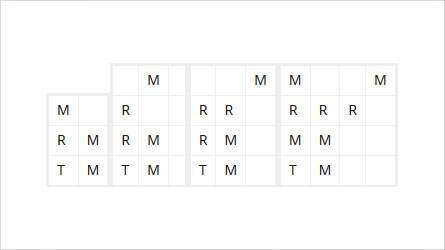
4. Positioning Tips
- Have a reason for the exact square that you put your unit in. Things to consider:
- Is my unit quickly getting in range to attack?
- Is my unit dying before it can cast it’s ability? If so, place 1 or 2 units beside it
- Is my unit casting its ability quick enough? If not, place it more forward/remove units beside it
- Is my unit’s ability hitting enough targets?
- Are my units dying in the right order?
- Are my units attacking the same target? If not, line them up vertically (ranged)
- Positioning against assassins: move everything up 1 space from the bottom and put 2 front line units in the corner (the second one blocks the corner one from moving for a moment)
Examples: R = Ranged, T = Tank, M = Melee
5. Item Tips
- Don’t know who to give an item to? Give it to a unit that you will 100% sell later
- Think about an item’s combinations and whether or not you are okay with that unit having the combined item
- You can give items to a unit without combining them if they both belong on that unit (e.g. Fish Fork and Wooden Club, but you don’t want to combine them)
- A unit gains mana from taking damage; armor reduces damage taken and mana gained
- Health is better on a unit that you want to cast its ability quickly and not die before then
- Armor is for a unit that you just want to have survive as long as possible
- Mana items are a premium; if you know what your final composition is going to be, consider saving them if there will be a unit later that really needs it (you can give them to a unit you will sell)
- Don’t be hasty to combine items in the late game unless you are in danger of dying. Other players will die and may drop items for you
6. Miscellaneous Tips
- Once you are comfortable with your composition’s positioning (otherwise, just watch your two armies start fighting), STOP WATCHING YOUR UNITS FIGHT (yes, I know this is really really hard)
- During each battle, you should open the scouting tab and take note of everyone’s compositions to understand how strong you are relative to the field and whether or not you should make any compositional changes
- Don’t hold onto pairs of goblins or 2* goblins (Ripper is ok) for too long
- These units are not going to be in your final composition
- Unless on a win streak, I would definitely look to sell them (even pairs) for income/bench space/gold for other units at Rounds 8-9
- Honestly, you will probably have a better overall win rate by never picking any goblins and going for a losing streak every game than picking goblins and not having a clear final direction in the early-mid game
- The biggest mistake I see players (even high rank) make is being overly aggressive/rolling too much in the early game and being overly passive/not rolling enough in the mid-late game. In the early game, if you are not on a win streak, you should not be rolling — instead, save up. In the mid-late game, it’s common that many people are stubbornly sitting at 50g, even when 2-3 losses from death. It’s too late to respond to a loss; gold should be spent preemptively to mitigate damage as there’s no guarantee that you won’t lose just because you spent all of your gold.
- I usually heavily prioritize economy in the early game, selling 2* units and pairs of units that you would probably think is crazy, but I know I will not use them in my final composition. If I lose twice in a row, I will sell to reach an income threshold and go on a loss streak; if my win streak breaks, I will sell to reach an income threshold because I know I cannot reliably go on a win streak. Then, on Round 17, I roll heavily, assemble my final composition faster than others, and punish greedy players or those with weak economy.
7. Game-Changing Optimizations
- You cannot face the same opponent 2 rounds in a row unless someone has died during the previous round
- This can be taken advantage of if there is only one player running Assassins / Mages
- Item Priorities: Magicka Crystal, Rune Hammer, Kira Axe
- Wait until after all of the initial PvE rounds before choosing items
- If you are offered 2 Magicka Crystal/Ring of Life and 1 of the other, I would say take them all and hope to make Refresher
- Rune Hammer -> Axe of Devil Blood, Claw Wand
- Kira Axe -> Cloud Halberd, Claw Wand
- Sniper: Dwarf Racial
- If against Sniper, you want your low hp units to be diagonally across from him (as far away as possible). His range is long but doesn’t cover the entire board.
- Likewise, if you are using Sniper, you want to position vertically across from the enemy low hp units
- Get very familiar with positioning against assassins
8. When your composition is contested / Transitioning [Advanced]
This is not an essential skill.
Of everything that this guide has covered, this is the most difficult and least impactful concept to master. This is because transitioning is essentially playing the odds; even if your composition is heavily contested by others, you can still get lucky and find all of the units you want; transitioning does not guarantee you a better outcome. Nevertheless, it will definitely still boost your overall win rate if done properly.
I would consider my composition as contested if there are 2 stronger (I don’t mean HP, but rather composition strength/progress, and economy / streaks) players than me.
At this point, I have more distance to make up with potentially less resources in order to match their strength. It is very likely that they will level up before me and have more money to roll to find all of the compositional units first.
If there are weaker players contesting my composition, I also have to assess how likely that they will die in the near future and release their units back into the pool and whether or not I will be healthy enough to take advantage of that at that point.
If you are the strongest player running a contested composition, you have no reason to transition. You may, however, be incentivized to roll slightly more aggressively to find your key units first if you haven’t found them yet.
After that, you may want to focus on saving up your economy and leveling up instead of going for 3* units, waiting until your competitors die and your units are available again.
If your composition is contested (you are weak), you can consider transitioning. The key to transitioning is advanced preparation. From your routine scouting (around Round 13), you should have an idea of if your composition is going to be contested.
If so, you should start picking up core units for the composition you plan to transition to. You can either try to salvage part of your current composition (e.g. Knights + Glaciers -> Warriors + Glaciers), or transition to Mages.
Mages are a common mid-game transition; they are often uncontested because the key units (Thunder Spirit, Tortola Elder) are just starting to become readily available at this point (unit rates from player level), and those already invested and uncontested in another composition don’t have much of a reason to switch.
Anyone who tries to build Mages right from the start (forcing) will most likely take massive damage or have poor economy. Since transitioning to Mages is such a drastic change, you need a strong economy and be willing to use the entirety of it to get to a stable state.
Mage compositions are very volatile in that you need just enough burst damage to kill everything. An unsuccessful transition leaves the enemy team barely alive whereas a successful transition will take you on a win streak.
Transitions should be finalized by Round 17 to avoid taking large amounts of damage.
9. Reflections on my climb
My most frequent composition by an enormous margin was Warriors + Beasts, and my second most frequent composition by another large margin was Warriors + Hunters.
If you follow my guide / philosophy of picking various core units early instead of goblins, you too may find that Warriors is the most likely outcome. There are 6 warriors which are 3-cost and below, and 6 warriors on Round 9 is extremely strong.
Warriors + Beasts has a power spike on 6 units with 6 warriors, a spike on 7 units with Poisonous Worm, a spike on 8 units with 4 Beasts, and a spike on 9 units with Marine / Warlock. It is extremely strong and punishing (due to the summons) early to mid game when everyone is trying to build up their economy.
Warriors are strong against assassins, and Poisonous Worm summons are immune to magic damage. It puts enormous pressure on people trying to force certain compositions prematurely without properly transitioning, and keeps up the pressure until the very late game when it cannot match a 3* carry with one of its own.
Doom Arbiter MVP.